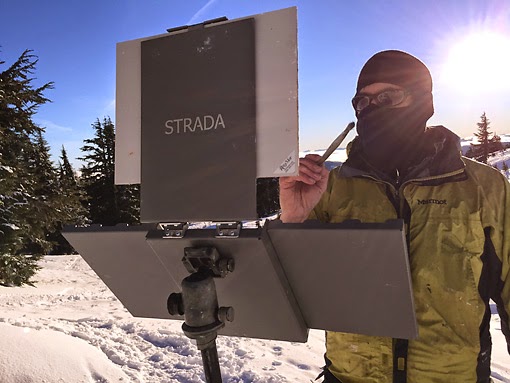
No, no, not this Mod and Mini...
I mean modding this Mini...
If you are a loyal reader of this blog then you know I have already written about the Strada Mini plein air easel. (That post can be found here.) And you already know how nifty I think the Mini is too!...
If you are a long-time reader then you also know I am not one to leave my gear untouched or unmodified. I am always tinkering or tweaking my gear to make it suit me better and the Mini is no different.
But before I continue – based upon my experience with a stock Strada Mini – I want to clearly state I think it is one of the best options out there for the outdoor painter wanting a bomb-proof easel – modified or not. There is no reason to change anything about it. Unless, like me, you don't like mixing your color on a white plexiglass palette.
 Instead, I prefer to mix my colors on a grey glass surface because I can clear off an area quickly with a razor blade. Being able to do so makes it easier to keep my lighter tints clean without the need for a huge palette. (I used to make ginormous palettes and attached them to my teensy-weensy easels but once I switched to using glass and a razor blade Small became beautiful again.)
So the ONLY mod I could imagine for the Mini was switching out the plexi for glass. And honestly, even I knew I was stretching the need.
But glass is brittle and can be easily shattered so there are some mods that must be made to the Mini before it can be installed.
If you lift the plexi-glass palette out of the main mixing pan you will find there is a receptor for your tripod mount sticking up above the surface. Not much can be done about that, you have to leave it alone. But in each corner there is a corresponding 'pin' to keep the corners of the plexiglass level with the center receptor. If I wanted to insert glass in a secure way I would have to caulk it in place against the sides and bottom of the pan with no void underneath. Otherwise the glass sheet would eventually break from pressure applied from above, or perhaps a shock from the side when the easel was knocked around. Darn! If I could only get rid of those pesky pins the manufacturer had so firmly set in place. Then I could use the structure of the aluminum box itself to avoid breakage.
What to do? Hmmmmm....
So here you go: a Drill 'n' Fill solution for inserting a glass palette into a Strada Mini. Call a local auto shop to cut and drill the glass, 3/16 inch thickness for the center pan, and 1/8 thickness for the side palettes, and use a little clear silicone to glue the glass into place.
I will be taking this baby to Mexico this week to paint and teach. Yes! It will save a lot of room as I move around. We'll see how it feels and how it performs. If I don't like the glass, or if it breaks somehow, I'll knock the pieces out and paint in the pan. My palette always end up looking like a Jackson Pollock anyway, so why not?
"Hasta baby!" – TJK
You may have missed out on my winter Mexico Workshop but I've got another fantastic international plein air class lined up in Tuscany for this September. Details can be found below...
_____
Would you like to improve your outdoor painting skills in Italy this next September? If so, click here to learn about my annual Plein air Tuscany! workshop. It is a fantastic experience and garners rave reviews!
If you want even more info send me an email asking for a FAQ Sheet. It will detail where we will stay, what we will do, what we will learn, and of course, what it will cost. But wow, the US dollar is strong against the Euro right now so there may never be a better year to go than in 2015. Registration is open and folks ARE signing up!...


3 reader comments:
Nice modification, I might have to get a Strada now.
I like your modification. I also wanted glass, so I placed the glass over the plastic palette that comes in the Strada, after back-painting the glass with neutral gray. It works great. UPside: I am afraid of my Dremel so I didn't have to make any cuts. The DOWNside is the weight of the Plexiglass is added in. I like to backpack/bike to my location when possible, so weight is a big issue for me. However the Strada starts out so light and small that I can afford a little extra so I am very happy with it. I absolutely love my Strada mini.
PS... I stabilized the plexiglass by adding more pads underneath in order to keep the glass from tweeking around and sealed it in with hot glue.
Post a Comment