Well clearly, it has been a long time since I posted, so here's something new!... But before I begin, I want to share I am teaching an awesome plein air workshop in Sicily this October, 17th - 24th, 2021. Italy is now open so we can eat some great pasta, drink some amazing wine, and paint some beautiful sun-drenched pictures!
Studio Lighting for Painters
I am largely known as an observational painter, an artist who prefers to work en plein air whenever possible, although I do paint a fair amount in my studio. Sometimes from a still life or model, and sometimes from a monitor. (gasp!)Yes, a monitor... 😳
I started off as a commercial illustrator, which has probably damned me to Fine Art Purgatory at the least, if not Hell itself. But as a result, I have no strong feelings about remaining artistically pure in any sense of the word. However, having confessed to my earlier sins, I do recognize the need to train one's self by working directly from life as much as possible. Painting from life hones your observational skills. Abilities which cannot be developed from looking at a photograph print or LED screen.
But I am posting this to share information about lighting your studio space, not argue about whether or not working from a photo is a sin. I'll leave that debate to others instead.
Most of us have turned part of our home into a studio...
It might be a corner of the kitchen table, or an entire floor of your house. In the beginning I lived in a tiny one-bedroom, second floor apartment and I use the small living room as my workspace. I didn't have a sofa, sitting chair, coffee table because they interfered with the easel. And as a young single artist living that way wasn't a problem. I could read in the kitchen or watch television in bed. But the idea of having to make do such a tiny space now, alone or with another person – let alone another artist, which I did – seems crazy now.
I am better off in my current studio. I may wish I had more room, with north facing windows – and I once did have such a space. But I had to vacate it when the building it was in was turned into an indoor growing-operation after weed became legal. (Pluses and minuses, right? 😁) I eventually ended up buying a mid-century modern daylight ranch on a slope with a large family room downstairs and that daylight basement works pretty well for me now. I still might wish for more space and north windows, but I am largely content with what I have.
However, the light in my studio sucks. There is a twelve-foot row of 60 inch windows along one wall so there is plenty of light. The problem is the windows face southwest, which means the natural light changes dramatically over the course of the day.
So what to do? Beyond turning my studio into a dark cave by shuttering the windows?
Supplement the Light...
Lighting has come a long way since my first apartment. What once was unacceptable is now easily fixed with our new lighting tech.
I used to hate LED lights and refused to use them in any way. Not on the house, not on the Christmas tree, not for reading, whatever. To me, LEDs felt cold, hard, and brash. The kind of light that sucked all the warmth and romance out of my work. But LEDs have changed. We can now buy (relatively) inexpensive color-corrected, full-spectrum lights in a wide range of formats and temperatures. You can find temperatures from 2700k (which is similar to a 100 watt tungsten bulb), to 3000k, 4000k, 5000k, and 6500k LED bulbs. All with form factors which can be inserted into standard sockets and fixtures.
But LED specifications are still new and confusing to many painters, which can make it difficult to choose the right ones to augment the deficient light in your studio.
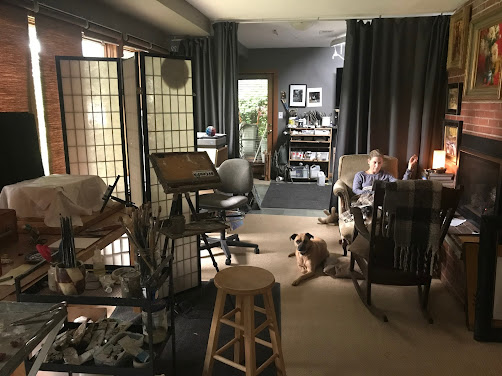
So let me describe my studio space...
Approximately 17 by 35 feet.
A single bank of 120 x 60 inch windows facing southwest. (Aaaak!)
Two hard-wired ceiling fixtures towards the opposite ends of the studio, on a single wall switch.
A ceiling height of 8 feet, 4 inches. (An important point to consider when designing your lighting set up. This is low for good studio lighting.)
Oh, and lately, I've been sharing the space with my wife, who is painting again after many years.
My Current Lighting Hardware:
Two daylight balanced 3000k LED bulbs in two ceiling fixtures. Both are on a dimmer switch so the lumens may be adjusted as needed. A total of 4 bulbs. Note the two different colors used to reduce the temperature bias. (I often view a painting only under these lights because they represent the temperatures and lumens found in most homes.)
One 48 LED tube inserted into a cheap light fixture. The light hangs 8 inches above the top mast of my easel and slightly out front. With older lighting technology this would be an insolvable problem. But the LED light tube is so diffused it feels as if the light is coming down from a light well ten to twelve feet above my head. It provides a beautiful even wash.
👉 QUICK TIP: If you are just looking for a quick and easy solution for your easel then I recommend ArtEscape's LED light tubes. They can illuminate a canvas from a 6 x 8 to a 36 x 48 inches. Even larger, actually. (In fact, since every light is hand made Doug would be happy to custom build you any size light. His lights may seem pricey but they provide you with a simple and immediate solution. I guarantee his light(s) will improve your experience at your easel.) Doug is literally a rocket scientist, now retired, and he paints like you. You simply clamp his light on, plug it in, and start painting.
But how can you find a good lighting solution?
Let's start by defining a few important terms. Once you understand them you can decide what will work in your studio.
Day-light Balanced Bulb: A term used by manufacturers to claim the color of their light matches the color of the sun at noon on a clear day. Technically, this spec usually runs between 5000k and 6500k – 'k' being a symbol to indicate the Kelvin scale. The Kelvin scale is used by physicists to quantify the visual temperature of a light source. I originally installed 6500k daylight balanced LED lights in my studio but decided the 6500k threshold was too cool for painting indoors and collectors will almost always display the artwork they own under warmer lights.) So the term "Daylight Balanced" is not all that helpful since the temperature of the light can be what is claimed, yet the light can still be deficient in multiple parts of the spectrum.
👉 CRI Index: A more exact term to use to evaluate the suitability of a light for your studio. CRI stands for 'Color Rendering Index" and any number of 94 or above can be considered suitable to work under. A CRI of +94 means the various colors of the spectrum are equally balanced so there will be no bias in the light to disrupt your sense of color. (Google the term metamerism if you want to learn how the appearance of a color changes under different lights.)
https://en.wikipedia.org/wiki/Color_rendering_index
LED lights commonly come in a range between 2700k to 7200k, although I wouldn't recommend anything below 4000k or above 5000k for your studio. In my experience, both 4000k and 5000k are a decent compromise between the temperatures you experience outdoors and the lighting you find in most homes.
👉 Lumens: Lumens quantify how much light a light source emits. We once used watts to describe the brightness of a bulb but this has changed due to the new kinds of light now available. To put it simply, the higher the lumens, the stronger or brighter the light.
But what about painting from a monitor?...
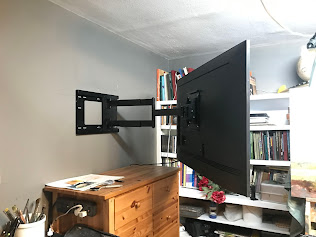
And speaking of painting from a monitor, it is important to balance or equalize the lumens of the light on your canvas with the lumens coming out of your painting monitor. You also do not want the area around the monitor to be too dark or you may have difficulty gauging the values and colors in your reference. So make an effort to balance both areas of light.
Supplier Links...And finally, I have hung curtains in such a way that they can be opened or closed to eliminate reflections from windows or lights elsewhere in the studio. It is a good to plan out your workspace before buying the hardware. And know that even if you do plan well you will probably still need to tweak things after everything is installed. If only to make the painting environment perfect!
The 48 light bar above my easel:
I am using one D50 5000k T8 LED Tube Light.
The ArtEscapes Easel lights
If you have questions about anything in this post please don't hesitate to ask. I'll be happy to respond!
TJK
And remember, I am teaching a fantastic workshop in Sicily, October, 17 - 24, 2021. Among other helpful things, we will focus on the temperature of light and how to add it into the light and shadows of your paintings to create life and atmosphere. This will be one of my best workshops ever!


2 reader comments:
Thank you Thomas for all this great information. I moved to Lincoln City last fall and am planning on creating a studio in one of the two double car garages. Lighting is always a big question mark. So, your timely information is perfect.
Hello Karen, happy to learn you found the information useful. Let me know how setting up your space goes...
Post a Comment